Dec 30, 2023

VMWare : SATA Controller Passthrough for TrueNAS Scale

How to passthrough an onboard SATA Controller in VMWare ESXi v.6.7 Update 3 for TrueNAS Scale installation.

As the HP Z800 WorkStation comes with onboard 6-ports SATA Controller and 8-ports LSI SAS/SATA Controller, the existing LSI Controller was dedicated to VMWare ESXi v.6.7 thus leaving the SATA Controller unused.

For experiment purposes, I wanted to passthrough this SATA Controller to a VM for TrueNAS Scale use as Storage Pool and thus able to directly manage all the HDDs connected on this controller.


1. Firstly is to create a VM and install TrueNAS Scale and configure the network settings.

2. Next is to shutdown the TrueNAS VM.

3. In the ESXi Server Host, under --> Manage --> Hardware.

4. Look for --> Intel ICH10R 4-ports Controller --> Passthrough = Enable.

5. Put the ESXi Server Host into --> Maintenance Mode, and reboot the server.

6. After reboot, Exit Maintenance Mode.

7. Under the TrueNAS VM, right-click --> Edit Settings.

8. Click --> Add Other Device --> PCI Device.

9. A new hardware will be listed, ensure the new PCI Device = Intel ICH10R 4-ports Controller.

10. Boot-up the TrueNAS VM.

11. Login to TrueNAS, goto --> Storage --> Disks.

12. Now you should be able to see all the HDDs connected on that SATA Controller and proceed to create Storage Pool.


!!! HAPPY COMPUTING !!!


Dec 26, 2023

TrueNAS : Create a Virtual Machine (VM)

Did you know that TrueNAS can function like a Hypervisor ? TrueNAS itself can have containerization of Virtual Machine (VM).

Although its not a full scale Hypervisor (Tier-1), sometimes we just need to temporarily test an application or operating system. So it is very useful to be able to run a VM inside TrueNAS.


!!! HAPPY COMPUTING !!!

TrueNAS : Create User, Group and Samba (SMB) Share

How to create Users then add them into Group and create a Samba Share. Samba share is very useful for folder(s) and file(s) sharing between computers.

But not all folders you want to share to everyone, maybe some confidential data that only you have the access.

Users account created in TrueNAS can be assigned or added into a Group, by grouping all your users together in group will make it very easy for an administrator to manage the permissions and access of file and folder sharing.


!!! HAPPY COMPUTING !!!

Dec 1, 2023

VMWare : Enable Hard Drive's Serial Number

There are times where some Operating System (OS) needs to have the Hard Drive's Serial Number or UUID enabled for it to work correctly.

This is especially true when it comes to TrueNAS installation in VMWare ESXi server. Although it is NOT RECOMMENDED to install TrueNAS (Scale/Core) in a virtualized environment, but for some Home Lab or for testing purposes, it is OK to do so.

1. The said Virtual Machine (VM) must be shutdown first.

2. Next, edit the VM's settings.

3. Goto --> VM Options.

4. Under --> Advanced.

5. Click --> Edit Configuration.

6. Click --> Add parameter.

7. Under Key, type --> disk.EnableUUID

8. Under Value, type --> TRUE

9. Save and exit.

10. Then only power-on the VM.


The Hard Drive's Serial Number will now be automatically created by ESXi server and TrueNAS will be able to detect those Virtual Hard Drive.


!!! HAPPY COMPUTING !!!

Nov 27, 2023

Ubuntu : Change NTP Server

At times it is recommended to change the NTP server for a more accurate Time Sync. This is to ensure all servers have the same Date, Time and Zone.


$ sudo nano /etc/systemd/timesyncd.conf


Add or modify the following line and save the file :-


NTP=time.google.com


Next, restart the time service :-


$ sudo systemctl restart systemd-timesyncd


If required, you can check whether the time server can be contacted :-


$ sudo cat /var/log/syslog | grep systemd-timesyncd


Verify the NTP connections :-


$ sudo timedatectl show-timesync | grep ServerName


!!! HAPPY COMPUTING !!!

Nov 21, 2023

[UPDATE] Zabbix : Installation and Configuration

Latest Zabbix v.6.4, installation and configuration in Ubuntu Server v.22.04.3 LTS.


1. Install Ubuntu Server v.22.04.3 LTS and configure the basic configurations.


$ sudo apt update && sudo apt upgrade -y

$ sudo timedatectl set-timezone Asia/Kuala_Lumpur

$ sudo touch /etc/cloud/cloud-init.disabled
 
 
2. Install Pre-requisites packages.


$ sudo apt install wget git mysql-server php apache2 -y


3. Install Zabbix Repository and update.


$ sudo wget https://repo.zabbix.com/zabbix/6.4/ubuntu/pool/main/z/zabbix-release/zabbix-release_6.4-1+ubuntu22.04_all.deb

$ sudo dpkg -i zabbix-release_6.4-1+ubuntu22.04_all.deb

$ sudo apt update


4. Install Zabbix Packages that includes the Server, Frontend and Agent.


$ sudo apt install zabbix-server-mysql zabbix-frontend-php zabbix-apache-conf zabbix-sql-scripts zabbix-agent


5. Ensure that MySQL Server is up and running before proceeding this steps. You will be prompted to create a password, proceed to create the password.


$ sudo mysql -uroot -p
password

mysql> create database zabbix character set utf8mb4 collate utf8mb4_bin;

mysql> create user zabbix@localhost identified by 'password';

mysql> grant all privileges on zabbix.* to zabbix@localhost;

mysql> set global log_bin_trust_function_creators = 1;

mysql> quit;


6. Import the Zabbix database schema into MySQL database. You will be prompted to key-in MySQL password. Depending on your system, it may a while to complete.


$ sudo zcat /usr/share/zabbix-sql-scripts/mysql/server.sql.gz | mysql --default-character-set=utf8mb4 -uzabbix -p zabbix


7. Once completed, disabled back the log_bin_trust_function option.


$ sudo mysql -uroot -p
password

mysql> set global log_bin_trust_function_creators = 0;

mysql> quit;


8. Configure Zabbix server to access the database.


$ sudo nano /etc/zabbix/zabbix_server.conf

DBPassword=password


9. Restart and Enabled both Zabbix and Apache2 services.


$ sudo systemctl restart zabbix-server zabbix-agent apache2

$ sudo systemctl enable zabbix-server zabbix-agent apache2


10. Now, at another computer and browse to --> http://[Zabbix server]/zabbix

You need to perform some basic configuration on the Zabbix server before first use. This may includes the following :-

  • DB Type = MySQL
  • DB Name = zabbix
  • DB User = zabbix
  • DB Password = password
11. The standard Zabbix login credentials as below (case sensitive) :-

  • Username = Admin
  • Password = zabbix

!!! HAPPY COMPUTING !!!


Nov 12, 2023

TrueNAS : Build Your Own NAS (Network Attached Storage)

Building your own NAS (Network Attached Storage) is very easy and simple with TrueNAS. It supports a wide variety of hardware thus making it simple and easy to install.

You can make use of any old computer with at least 4GB or more and a minimum of 4 Hard Drives with any make or model, preferably with the same capacity (eg. 1TB). The performance of system will solely depends on your choice of hardware but for Home use it is more than sufficient.

There are 2 Community Edition available :-
  1. TrueNAS Core
  2. TrueNAS Scale
TrueNAS Core is based on BSD (Berkeley Software Distribution), it's very robust and stable.

TrueNAS Scale on the other hand is based on Debian Linux, it's also very stable and more suitable for Home use because it's using Debian Package.

While TrueNAS Enterprise is more designed towards Enterprise companies with demands on High Availability, High Performance and Professional Supports. iX System also developed and sell pre-build TrueNAS System to cater for anyone that doesn't want to build their own.

For more information about TrueNAS, please visit their website at https://www.truenas.com/


Why TrueNAS ?

Well first of all, TrueNAS is using OpenZFS. It's an Open Source Storage Platform that have functionality of both traditional file system and volume manager.

Unlike other Array Controller that required all hard drives to be in the same Make and Model, OpenZFS make use of mixed Make and Model to create a Storage "Pool" thus making it very suitable for Home use because not everyone have the same hard drive specifications laying around.

More information about OpenZFS can be found here at https://openzfs.org/wiki/Main_Page


Step-by-Step Guide :

1. Download the latest ISO file from TrueNAS website (https://www.truenas.com/).

2. Use any preferred ISO Maker/Writer to an external USB Flash Drive, a minimum of 8GB will be sufficient.

3. Once the USB Flash Drive is ready, you can plug into the computer.

4. But before installation, we need to ensure that all the hard drive is correctly detected and remove any RAID array configuration. ZFS works best without any RAID configured.

5. You will need to choose the install drive, any capacity drive will do. Preferably the first drive that is connected.

6. After that, you will be prompted to specify an Administrator's password, this password will be used to login to TrueNAS Web GUI on the later stage.

7. Once the installation completed and computer rebooted, on another computer and open your prefer browser (eg. Google Chrome) and type-in the IP Address of the server displayed at console screen.

8. Some basic configurations is required, we need to specify a Static IP Address for the server. This will ensure that everytime the server rebooted, it will use the same IP Address and also it is more easy to configure port forwarding in your router (if needed) for some applications to work.

9. Next is to create the first storage pool, you can configure as many pool(s) you want but all depends on the available hard drives. For example, ZFS-z required a minimum of 2 drives (similarly to RAID-1), if you have more than 2 hard drives (eg. 3 drives) then the additional hard drive will be used as Parity Drive which are similarly to RAID-5.

10. Now you TrueNAS will work correctly, further configuration is required such as creating SMB (Samaba) Shares, NFS Share or whichever you required.


Video below :-


!!! HAPPY COMPUTING !!!


Nov 8, 2023

Batch : Rename Hostname via Batch File

This is an example of a batch file to rename the Hostname or Computer Name as per your preferences, it is much faster way to do computer renaming for many computers.

Note that the batch file must be "run as administrator" mode in order to works.

 @ECHO OFF
CLS
>NUL CHCP 65001

:asktorename
REM To ask whether to Rename the Hostname or not.
ECHO.
ECHO.
ECHO.
ECHO               ╔═════════════════════════════════════════╗
ECHO               ║         RENAMING THE HOSTNAME           ║
ECHO               ╚═════════════════════════════════════════╝
ECHO.
CHOICE /M "──────────────► DO YOU WANT TO RENAME THE HOSTNAME "
    IF ERRORLEVEL 2 GOTO eof
    IF ERRORLEVEL 1 GOTO askforname
GOTO eof
REM --------------------------------------------------------------------------------------

:askforname
REM To ask User for the preferred hostname.
ECHO.
ECHO.
SET /P NEWNAME="PLEASE TYPE THE NEW HOSTNAME: "
ECHO.
ECHO "     ► ► ► THE NEW HOSTNAME IS ───► %NEWNAME%"
CHOICE /M "     ► ► ► IS THIS CORRECT "
    IF ERRORLEVEL 2 GOTO asktorename
    IF ERRORLEVEL 1 GOTO dorenhost
GOTO eof
REM --------------------------------------------------------------------------------------

:dorenhost
REM To proceed Rename the Hostname as per Input by User.
ECHO.
ECHO "     ► ► ► OK, RENAMING HOSTNAME → %NEWNAME%, PLEASE WAIT..."
WMIC COMPUTERSYSTEM where name="%COMPUTERNAME%" CALL RENAME name="%NEWNAME%"
TIMEOUT /t 3 /NOBREAK
ECHO.
ECHO "     ► ► ► RENAMING HOSTNAME COMPLETE"
ECHO.
ECHO "THE NEW HOSTNAME WILL TAKE EFFECT AFTER COMPUTER RESTART"
TIMEOUT /t 5 /NOBREAK
GOTO eof
REM --------------------------------------------------------------------------------------

:eof
START SHUTDOWN /r /f /t 10
COLOR
>NUL CHCP 437
EXIT /b


!!! HAPPY COMPUTING !!!

Nov 6, 2023

[UPDATED] Internet Explorer : Enabled via VBS Script File

Latest script to launch Internet Explorer with preferred webpage loaded.

1. Open --> Notepad

2. Type or Copy the following script:

Set objExplorer = CreateObject("InternetExplorer.Application")
with objExplorer
    .Navigate strPath
    .ToolBar = 1
    .StatusBar = 1
    .Width = 1000
    .Height = 593
    .Left = 1
    .Top = 1
    .Visible = 1
    .FullScreen = 0
    .Navigate("https://www.google.com.my")
End With

 Note: Replace the URL with your preferred URL address.


3. Save the file as --> IE_Link.vbs

4. Test run the script file, you can also create a Shortcut in the "Desktop" and replace the icon to Internet Explorer icon too.


!!! HAPPY COMPUTING !!!

Oct 17, 2023

Internet Explorer : Enabled via VBS Script File

 As of 17-Oct-2023, latest Windows 10 update have yet again forced Internet Explorer (IE) to redirect and open via Edge browser.

No idea why Microsoft kept on forcing users to use Edge, and their "IE Mode" is sluggish and not compatible with local web server (which only works best in IE11). Edge browser is totally rubbish to our intranet application.

"Microsoft you cannot force user to Edge nor expect us to re-write the entire application to Edge compatible, as this will incurred lots of money, time and resources."

I do hope Microsoft see my message...


Workaround for the time being :-

1. Open --> Notepad

2. Type --> CreateObject("InternetExplorer.Application").Visible=true

3. Save file as --> IE.vbs

4. Create a desktop shortcut.

5. Change the icon to "IE" icon.

6. End.

Disadvantage Note : You cannot save any "Favorites" link inside IE, doing so will only automatically open the link in Edge browser.


!!! HAPPY COMPUTING !!!

Sep 15, 2023

Windows 11 : Built-In Apps that can be Remove

Windows 11 comes bundled with a some Apps that may or may not be needed in a Corporate environment, these may include App such as Xbox, Video Editor etc.

But removing all those unnecessary Apps maybe troublesome, and worst breaking the "SysPrep" function and further preventing for a mass deployment.

Below are the few Apps that can be removed safely without breaking "SysPrep" functionality. You will need to remove script lines for App(s) that you want to retain.

Copy and save the file as PowerShell Script (.ps1).


Write-Host
Write-Host
Write-Host "**************************"
Write-Host "* Removing Appx Packages *"
Write-Host "**************************"
Write-Host
Write-Host "Removing Zune Video..."
Get-AppxPackage -AllUsers *ZuneVideo* | Remove-AppxPackage
Start-Sleep -s 5
Write-Host "Removing Zune Music..."
Get-AppxPackage -AllUsers *ZuneMusic* | Remove-AppxPackage
Start-Sleep -s 5
Write-Host "Removing Microsoft Your Phone..."
Get-AppxPackage -AllUsers *YourPhone* | Remove-AppxPackage
Start-Sleep -s 5
Write-Host "Removing Xbox Speech..."
Get-AppxPackage -AllUsers *XboxSpeech* | Remove-AppxPackage
Start-Sleep -s 5
Write-Host "Removing Xbox Identity..."
Get-AppxPackage -AllUsers *XboxIdentity* | Remove-AppxPackage
Start-Sleep -s 5
Write-Host "Removing Xbox Gaming Overlay..."
Get-AppxPackage -AllUsers *XboxGamingOverlay* | Remove-AppxPackage
Start-Sleep -s 5
Write-Host "Removing Xbox Game Overlay..."
Get-AppxPackage -AllUsers *XboxGameOverlay* | Remove-AppxPackage
Start-Sleep -s 5
Write-Host "Removing Xbox App..."
Get-AppxPackage -AllUsers *XboxApp* | Remove-AppxPackage
Start-Sleep -s 5
Write-Host "Removing Xbox TCUI..."
Get-AppxPackage -AllUsers *Xbox.TCUI* | Remove-AppxPackage
Start-Sleep -s 5
Write-Host "Removing Windows Maps..."
Get-AppxPackage -AllUsers *WindowsMaps* | Remove-AppxPackage
Start-Sleep -s 5
Write-Host "Removing Windows Feedback Hub..."
Get-AppxPackage -AllUsers *WindowsFeedbackHub* | Remove-AppxPackage
Start-Sleep -s 5
Write-Host "Removing Windows Communications Apps..."
Get-AppxPackage -AllUsers *windowscommunicationsapps* | Remove-AppxPackage
Start-Sleep -s 5
Write-Host "Removing Windows Alarms..."
Get-AppxPackage -AllUsers *WindowsAlarms* | Remove-AppxPackage
Start-Sleep -s 5
Write-Host "Removing Microsoft People..."
Get-AppxPackage -AllUsers *Microsoft.People* | Remove-AppxPackage
Start-Sleep -s 5
Write-Host "Removing Solitaire Collection..."
Get-AppxPackage -AllUsers *MicrosoftSolitaireCollection* | Remove-AppxPackage
Start-Sleep -s 5
Write-Host "Removing Office Hub..."
Get-AppxPackage -AllUsers *MicrosoftOfficeHub* | Remove-AppxPackage
Start-Sleep -s 5
Write-Host "Removing Windows Get Started..."
Get-AppxPackage -AllUsers *GetStarted* | Remove-AppxPackage
Start-Sleep -s 5
Write-Host "Removing Windows Get Help..."
Get-AppxPackage -AllUsers *GetHelp* | Remove-AppxPackage
Start-Sleep -s 5
Write-Host "Removing Bing Weather..."
Get-AppxPackage -AllUsers *BingWeather* | Remove-AppxPackage
Start-Sleep -s 5
Write-Host "Removing Microsoft Gaming App..."
Get-AppxPackage -AllUsers *GamingApp* | Remove-AppxPackage
Start-Sleep -s 5
Write-Host "Removing Microsoft Bing News..."
Get-AppxPackage -AllUsers *BingNews* | Remove-AppxPackage
Start-Sleep -s 5
Write-Host "Removing Microsoft Teams App..."
Get-AppxPackage -AllUsers *MicrosoftTeams* | Remove-AppxPackage
Start-Sleep -s 5
Write-Host "Removing Microsoft To Dos App..."
Get-AppxPackage -AllUsers *Microsoft.Todos* | Remove-AppxPackage
Start-Sleep -s 5
Write-Host "Removing Microsoft Power Automate Desktop App..."
Get-AppxPackage -AllUsers *Microsoft.PowerAutomateDesktop* | Remove-AppxPackage
Start-Sleep -s 5
Write-Host "Removing Microsoft ClipChamp App..."
Get-AppxPackage -AllUsers *Clipchamp* | Remove-AppxPackage
Start-Sleep -s 5
Write-Host "Removing Microsoft Windows Terminal App..."
Get-AppxPackage -AllUsers *WindowsTerminal* | Remove-AppxPackage
Start-Sleep -s 5
Write-Host
Write-Host "Uninstallation of AppxPackages Completed."
Start-Sleep -s 5 
Write-Host
Write-Host
Write-Host "**************************************"
Write-Host "* Removing Appx Provisioned Packages *"
Write-Host "**************************************"
Write-Host
Start-Sleep -s 5
Write-Host "Removing AppxProvisioned Zune Video..."
Remove-AppxProvisionedPackage -Online -PackageName Microsoft.ZuneVideo_2019.22091.10041.0_neutral_~_8wekyb3d8bbwe
Start-Sleep -s 5
Write-Host "Removing AppxProvisioned Zune Music..."
Remove-AppxProvisionedPackage -Online -PackageName Microsoft.ZuneMusic_11.2305.4.0_neutral_~_8wekyb3d8bbwe
Start-Sleep -s 5
Write-Host "Removing AppxProvisioned Microsoft Your Phone..."
Remove-AppxProvisionedPackage -Online -PackageName Microsoft.YourPhone_1.22022.147.0_neutral_~_8wekyb3d8bbwe
Start-Sleep -s 5
Write-Host "Removing AppxProvisioned Xbox Speech..."
Remove-AppxProvisionedPackage -Online -PackageName Microsoft.XboxSpeechToTextOverlay_1.17.29001.0_neutral_~_8wekyb3d8bbwe
Start-Sleep -s 5
Write-Host "Removing AppxProvisioned Xbox Identity..."
Remove-AppxProvisionedPackage -Online -PackageName Microsoft.XboxIdentityProvider_12.50.6001.0_neutral_~_8wekyb3d8bbwe
Start-Sleep -s 5
Write-Host "Removing AppxProvisioned Xbox Gaming Overlay..."
Remove-AppxProvisionedPackage -Online -PackageName Microsoft.XboxGamingOverlay_2.622.3232.0_neutral_~_8wekyb3d8bbwe
Start-Sleep -s 5
Write-Host "Removing AppxProvisioned Xbox Game Overlay..."
Remove-AppxProvisionedPackage -Online -PackageName Microsoft.XboxGameOverlay_1.47.2385.0_neutral_~_8wekyb3d8bbwe
Start-Sleep -s 5
Write-Host "Removing AppxProvisioned Xbox TCUI..."
Remove-AppxProvisionedPackage -Online -PackageName Microsoft.Xbox.TCUI_1.23.28004.0_neutral_~_8wekyb3d8bbwe
Start-Sleep -s 5
Write-Host "Removing AppxProvisioned Windows Maps..."
Remove-AppxProvisionedPackage -Online -PackageName Microsoft.WindowsMaps_2022.2202.6.0_neutral_~_8wekyb3d8bbwe
Start-Sleep -s 5
Write-Host "Removing AppxProvisioned Windows Feedback Hub..."
Remove-AppxProvisionedPackage -Online -PackageName Microsoft.WindowsFeedbackHub_2022.106.2230.0_neutral_~_8wekyb3d8bbwe
Start-Sleep -s 5
Write-Host "Removing AppxProvisioned Windows Communications Apps..."
Remove-AppxProvisionedPackage -Online -PackageName microsoft.windowscommunicationsapps_16005.14326.20544.0_neutral_~_8wekyb3d8bbwe
Start-Sleep -s 5
Write-Host "Removing AppxProvisioned Windows Alarms..."
Remove-AppxProvisionedPackage -Online -PackageName Microsoft.WindowsAlarms_2022.2202.24.0_neutral_~_8wekyb3d8bbwe
Start-Sleep -s 5
Write-Host "Removing AppxProvisioned Microsoft People..."
Remove-AppxProvisionedPackage -Online -PackageName Microsoft.People_2020.901.1724.0_neutral_~_8wekyb3d8bbwe
Start-Sleep -s 5
Write-Host "Removing AppxProvisioned Solitaire Collection..."
Remove-AppxProvisionedPackage -Online -PackageName Microsoft.MicrosoftSolitaireCollection_4.12.3171.0_neutral_~_8wekyb3d8bbwe
Start-Sleep -s 5
Write-Host "Removing AppxProvisioned Office Hub..."
Remove-AppxProvisionedPackage -Online -PackageName Microsoft.MicrosoftOfficeHub_18.2204.1141.0_neutral_~_8wekyb3d8bbwe
Start-Sleep -s 5
Write-Host "Removing AppxProvisioned Windows Get Started..."
Remove-AppxProvisionedPackage -Online -PackageName Microsoft.Getstarted_2021.2204.1.0_neutral_~_8wekyb3d8bbwe
Start-Sleep -s 5
Write-Host "Removing AppxProvisioned Windows Get Help..."
Remove-AppxProvisionedPackage -Online -PackageName Microsoft.GetHelp_10.2201.421.0_neutral_~_8wekyb3d8bbwe
Start-Sleep -s 5
Write-Host "Removing AppxProvisioned Bing Weather..."
Remove-AppxProvisionedPackage -Online -PackageName Microsoft.BingWeather_4.53.33420.0_neutral_~_8wekyb3d8bbwe
Start-Sleep -s 5
Write-Host "Removing AppxProvisioned Microsoft Gaming App..."
Remove-AppxProvisionedPackage -Online -PackageName Microsoft.GamingApp_2021.427.138.0_neutral_~_8wekyb3d8bbwe
Start-Sleep -s 5
Write-Host "Removing AppxProvisioned Microsoft Bing News..."
Remove-AppxProvisionedPackage -Online -PackageName Microsoft.BingNews_4.2.27001.0_neutral_~_8wekyb3d8bbwe
Start-Sleep -s 5
Write-Host "Removing AppxProvisioned Microsoft Teams..."
Remove-AppxProvisionedPackage -Online -PackageName MicrosoftTeams_23231.411.2342.9597_x64__8wekyb3d8bbwe
Start-Sleep -s 5
Write-Host "Removing AppxProvisioned Microsoft Power Automate Desktop App..."
Remove-AppxProvisionedPackage -Online -PackageName Microsoft.PowerAutomateDesktop_10.0.3735.0_neutral_~_8wekyb3d8bbwe
Start-Sleep -s 5
Write-Host "Removing AppxProvisioned Microsoft ClipChamp App..."
Remove-AppxProvisionedPackage -Online -PackageName Clipchamp.Clipchamp_2.2.8.0_neutral_~_yxz26nhyzhsrt
Start-Sleep -s 5
Write-Host "Removing AppxProvisioned Microsoft To Dos App..."
Remove-AppxProvisionedPackage -Online -PackageName Microsoft.Todos_2.54.42772.0_neutral_~_8wekyb3d8bbwe
Start-Sleep -s 5
Write-Host "Removing AppxProvisioned Microsoft Windows Terminal App..."
Remove-AppxProvisionedPackage -Online -PackageName Microsoft.WindowsTerminal_3001.12.10983.0_neutral_~_8wekyb3d8bbwe
Start-Sleep -s 5
Write-Host
Write-Host
Write-Host "*******************************************************"
Write-Host "* Uninstallation of AppxProvisionedPackage Completed. *"
Write-Host "*******************************************************"
Start-Sleep -s 5
EXIT


!!! HAPPY COMPUTING !!!

Sep 9, 2023

VMWare : VMWare Tools for Windows XP 32-bit

VMWare Tools for Windows XP 32-bit, the tools is deprecated thus use at own risks.

1. Download the old version of VMWare Tools v.10.0.2 (https://drive.google.com/file/d/1nnjHGeavqOCjWIQSTCC6x-ksxnrCNCKX/view?usp=sharing)

2. Copy the Zip file into the VM Guest.

3. Extract the Zip inside the VM Guest.

4. Install a compatible CDROM or ISO Emulator (https://wincdemu.sysprogs.org/) or any preferred utility for Windows XP.

5. Mount the ISO file, search for "WinPreVista.ISO" and mount it as a CDROM drive.

6. Double-Click the drive for autorun, or browse it and run the setup according to your architecture. Such as "setup.exe" for 32-bit OS or "setup64.exe" for 64-bit OS.

7. Follow the on-screen instructions to complete the installations.

8. Once completed, eject or un-mount the drive and restart the VM.


!!! HAPPY COMPUTING !!!

Sep 5, 2023

Windows : Get Operating System Info in Command Prompt

How to get the installed Operating System information via the Command Prompt.

1. To get OS Architecture type.

wmic os get OSArchitecture


2. To get OS Edition info.

wmic os get Caption /value


3. To get OS CD-Key info.

wmic path softwareLicensingService get OA3xOriginalProductKey


!!! HAPPY COMPUTING !!!

Aug 30, 2023

Windows Terminal : Always Run as Administrator

How to Enable Windows Terminal to always "Run as Administrator" option.

1) Open --> Windows Terminal

2) Goto --> Settings

3) Under "Profile" section, select which profile you want to enable, in this case select --> Command Prompt

4) On the right-pane, scroll down and search for --> Run this profile as Administrator = On


!!! HAPPY COMPUTING !!!

Aug 28, 2023

Disassembly : HP Z800 Workstation

Recently I have bought a "Refurbished" HP Z800 Workstation from an online platform. The purpose of the purchase was to setup my first ever "Home Lab" server, this server will host a few services that I have in mind such as:

  • JellyFin
  • RustDesk
  • WebDAV
  • Windows Server
  • Ubuntu Server
The server also serve as platform for me to perform all sorts of testing including new version release, new open source projects and many others. But as a start, I will sharing an overview of the system that I've bought and how to dismantle it for general servicing.

The system that I've bought comes with the following specifications:

  • Dual processor of Intel Xeon X5660 2.80Ghz, 6-Cores, 12-Threads, 12MB Cache (LGA 1366).
  • 48GB DDR3 1333Mhz ECC Registered DIMM (6 x 8GB), 12 DIMM slots [Kingston KTH-PL313/8G] with NUMA Technology.
  • Intel 5520 Chipset.
  • Intel Matrix 6-ports SATA-3 RAID Controller.
  • LSI 1068E 8-ports SAS/SATA-3 RAID Controller.
  • HP SAS Back Panel Connector Kit.
  • nVidia Quadro FX-1800 768MB GDDR3, 30-bit, CUDA, 2 x DisplayPort, 1 x DVI port PCIe.
  • Intel WG82574L Gigabit Ethernet.
  • Broadcom 5764 LOM Gigabit Ethernet.
  • Realtek HD ALC262 Audio.
  • LSI 1394 OHCI Firewire.
  • 850watts 85% (Bronze) Power Supply Unit.
  • 4 Internal 3.5" HDD drive bays.
  • 3 External 5.25" ODD/HDD drive bays.
  • 3 Internal USB 2.0 Headers.
  • Rear I/O :
    • 1 x IEEE-1394a
    • 6 x USB 2.0
    • 1 x Serial (RS232)
    • 1 x PS/2 Keyboard
    • 1 x PS/2 Mouse
    • 2 x RJ45 Gigabit LAN
    • 1 x Audio In
    • 1 x Audio Out
    • 1 x Microphone In
  • Front I/O :
    • 3 x USB 2.0
    • 1 x Headset Out
    • 1 x Microphone In
    • 1 x IEEE-1394a
  • PCI Express Connectors :
    • 2 x PCIe Gen2 x16 slots 75W [Slot #2, #5].
    • 2 x PCIe Gen2 x16 (8) slots 25W [Slot #4, #7].
    • 2 x PCIe Gen2 x8 (4) slots 25W [Slot #1, #3].
    • 1 x PCI 32b, 33Mhz slot 25W [Slot #6].


Something to note that as this system is refurbished, there are some disadvantages :

  • Warranty already expired.
  • Tons of dust in the system.
  • Tons of scratches on both side of the panels.
  • Tons of small chips and dents.
  • Missing 2 Internal drive bay caddies.
  • Missing left-side feet trim.
  • Missing 1 rear slot cover.
  • Faulty DVDRW drive.

Under such "used" conditions, the system still able to POST and the seller also installed Windows 10 in a Kingston A400 240GB SSD (included as FREE) and I don't intend to use it. So far there are no issues with hardware side, only the appearance of the system is bad.

In order to clean this system properly, I have to dismantle almost everything and below are a video guide on how to dismantle it for cleaning purposes :


!!! HAPPY COMPUTING !!!

Aug 25, 2023

CloneZilla : Backup & Restore Computer (Disk-To-Image)

 CloneZilla : Backup & Restore Computer (Disk-To-Image).

This round we will focus on How-To Backup and Restore Computer using "Disk-To-Image" method in CloneZilla.


(A) STEPS 1 OF 4.
  1. Ensure the Source (Reference) Computer is in working condition, OS with up-to-date patches, installed Applications and Drivers etc.
  2. It is also recommended to perform a "Disk Cleanup" and "Defragmentation" before performing any backup.
  3. Firstly, is to Shutdown the computer and boot-up with CloneZilla bootable CD or External USB HDD.
  4. Select --> CloneZilla live (VGA 800x600)         {recommended}
  5. Select --> Preferred Language
  6. Select --> Keyboard type.
  7. Select --> Start CloneZilla
  8. Select --> device-image
  9. Select --> local_dev
  10. Press --> [ENTER]
  11. Plugin the External USB HDD and wait for 5 seconds.
  12. Then press --> [CTRL + C]
  13. Select --> the External USB HDD drive.
  14. Select --> Skip checking/repairing the file system before mounting
  15. Select --> the Main/Primary folder (if any) or just tab to "Done"
  16. Select --> Expert mode.
  17. Select --> savedisk option.
  18. When prompted, key-in the preferred Image File Name (eg. PC1_[Date])
  19. If there are multiple HDD in the Source Computer, ensure the correct HDD drive is selected.
  20. Select --> Priority:partclone option.
  21. Leave the extra parameters as default.
  22. Select the appropriate compression method or select --> -z1p Use parallel gzip compression, for multicore/CPU.         {aka normal compression}
  23. Leave the image splitting as default, which is "0"         {zero}
  24. Select --> Skip checking/repairing source file system.
  25. Select --> Yes, check the saved image.
  26. Select --> Not to encrypt the image.
  27. Select --> poweroff/Shutdown option.
  28. When prompted, type "Y" and press [ENTER].
  29. Wait until the backup process completed.
  30. Once completed the computer will auto-shutdown itself.

(B) STEPS 2 OF 4.
  1. Verify the backup image file.
  2. The image files should have the corresponding source hard drive's size.

(C) STEPS 3 OF 4.
  1. Boot-up the Target (Destination) Computer with CloneZilla.
  2. Ensure the Target's HDD is blank or data inside is no longer needed.
  3. Follow the above steps until you see "restoredisk" option, select --> restoredisk option to continue.
  4. Select --> the correct image file (if you have more than 1 image).
  5. Select --> Target HDD (if you have more than 1 HDD).
  6. Leave the extra parameters as default.
  7. Select --> Use the partition table from the image.
  8. Select --> No, skip checking the image before restoring.
  9. Select --> poweroff/Shutdown option.
  10. When prompted, type "Y" and press [ENTER].
  11. When prompted for confirmation, type "Y" and press [ENTER].
  12. You will be prompted again for confirmation, type "Y" and press [ENTER].
  13. Wait until the restore process completed and the computer will auto-shutdown itself.

(D) STEPS 4 OF 4.
  1. When everything is completed, you can now boot-up the Target computer to check everything such as installed applications, drivers, data etc.


!!! HAPPY COMPUTING !!!

Aug 11, 2023

Windows 10 : Delete Recovery Partition

Windows 10 "Recovery" partition is a special partition on system hard drive and is used to restore the system to factory settings in the event of system issues. To protect the recovery partition from being changed or deleted, the recovery partition usually doesn't have any drive letter assigned and other features or options are not available in Disk Management.

This "Recovery" partition can be deleted and it will not impact your existing Windows 10 OS. Though it can be deleted but to delete it, you must follow this steps.


NOTE : IT IS RECOMMENDED NOT TO DELETE THIS PARTITION ! DOING SO, YOU WILL NOT HAVE ANY LAST RESORTS IN THE EVENT OF OS ISSUES.


1. Run --> CMD (run as admin)

2. Type --> diskpart

3. Type --> list disk

4. Type --> select disk [number]
     (usually primary disk number is 0)

5. Type --> list partition

6. Type --> select partition [number]
     (in this case my, based on my drive's partition layout, the number is 4)

7. Type --> delete partition override

8. Type --> exit

9. Now, open "Disk Management" and you will notice that now there is a "Unallocated" space available in the drive.

10. Next step is to extend your [C:] drive by right-click --> Extend volume.

11. Ensure the full size is selected and click --> Next

12. Verify the new configuration and click --> Finish

Now you will have a larger capacity of the [C:] drive partition.


!!! HAPPY COMPUTING !!!

Aug 4, 2023

How To Identify Fake Kingston USB Drive

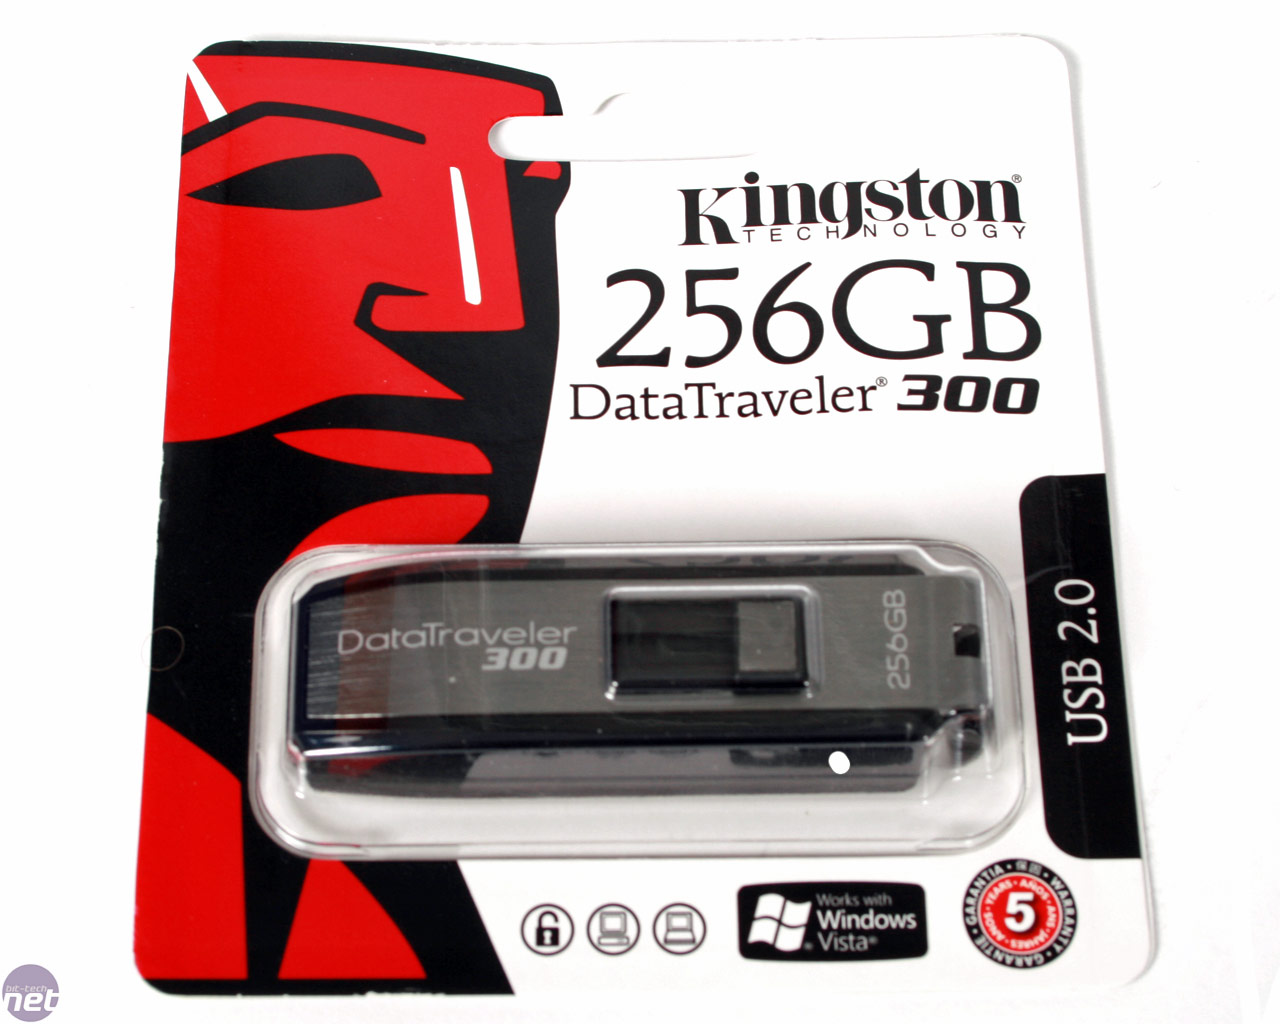
Recently I have bought a brand new Kingston USB drive from an Online Store. The purpose of this new drive was to make it as a bootable USB drive for Ventoy and hence the large capacity of 128GB.

It was a bargain at first...

After several FAILED attempts in making the drive to be bootable, I got curious and starting checking for the genuine of the product.

Here is my findings :-

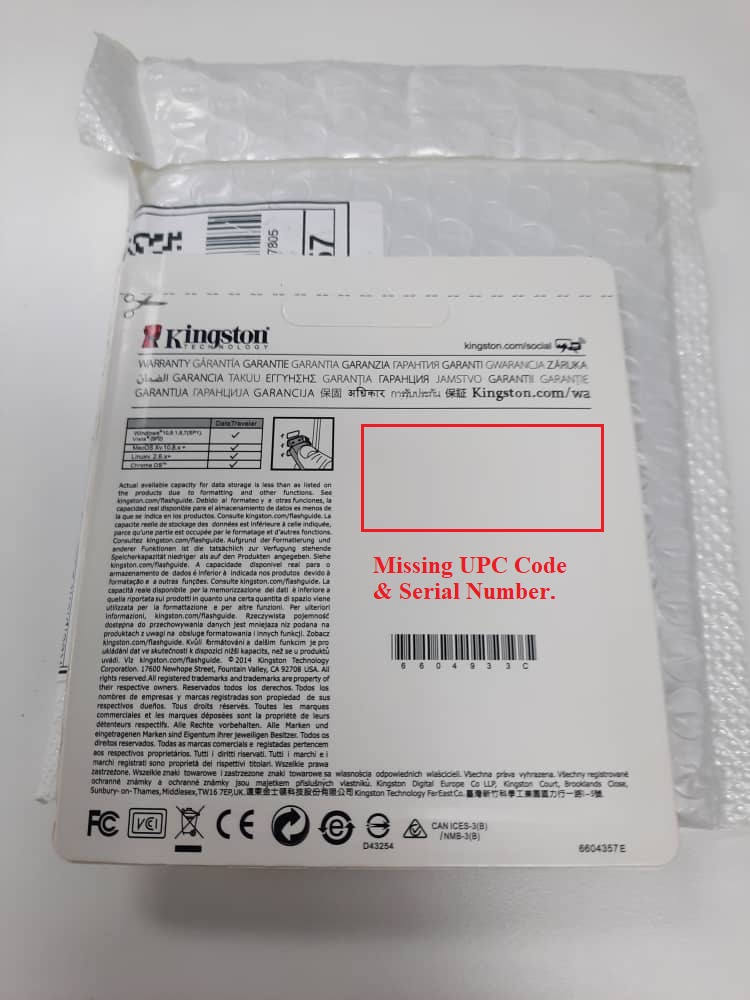
1. The Packaging was not Kingston's standard packaging but does resembles the original packaging.

(Original Front Packaging)


(FAKE Front Packaging)


(Original Back Packaging)


(FAKE Back Packaging)


2. The original Kingston USB drive have "Laser" engraving on the USB key.


                          (FAKE USB Drive)                                                 (Original USB Drive)


3. Using a third party utility to check the USB drive's VID and PID information reveals more details. The utility was called "CheckUDisk V5.4", you may google this utility and download it, no installation required.


4. Upon having the details, now you can cross-check it on this website (https://the-sz.com/products/usbid/index.php), this website contains many USB manufacturer information and their respective model.


(FAKE VID and PID, returns something else instead of Kingston)


(Original VID and PID, returns the correct Kingston's information)


Conclusions, always buy from reputable seller or Manufacturer's Official Website. This will ensure you get the original product and works as intended.


!!! HAPPY COMPUTING !!!

Jul 18, 2023

Ubuntu : Add/Change Apache 2 Ports

Add or Change Apache 2 server ports in Ubuntu.

1. sudo nano /etc/apache2/sites-enabled/intranet.gob.com.my.conf

2. Add line --> <VirtualHost *:80 *:8888>

3. sudo nano /etc/apache2/ports.conf

4. Add line --> Listen 80
                         Listen 8888

5. sudo systemctl restart apache2


!!! HAPPY COMPUTING !!!

Ubuntu : Install Let's Encrypt SSL in Apache 2

Install Let's Encrypt SSL Certificate in Apache 2 Server.

  1. sudo apt install certbot python3-certbot-apache
  2. sudo certbot --apache
  3. Type-in a valid email address.
  4. Terms and Conditions, type --> Y
  5. Marketing, type --> N
  6. Select domain.
Test Certbot Auto Renewal
  1. sudo certbot renew --dry-run

Check Certbot Auto Renewal Status
  1. sudo systemctl status certbot.timer

!!! HAPPY COMPUTING !!!

Jul 11, 2023

Touch 'N Go : How To Add and Reload New NFC Card

 This video is specifically created for the use of people who doesn't have a very good understand on SmartPhone devices and how the new Touch 'N Go NFC card works.

The video is in Chinese (Mandarin) voice thus making it more easily to understand for those who didn't speak English language.


!!! HAPPY COMPUTING !!!


Jul 4, 2023

Ubuntu : Change SSH Port

Whenever deploying an Ubuntu server, accessing and managing it with SSH via LAN (Local Area Network) was never an issues.

But if you wanted to allow SSH access remotely or through Internet, then the standard port must be changed and the server must be protected behind a firewall.

1) To check existing SSH port :-

 sudo cat /etc/ssh/sshd_config | grep Port


2) To change the SSH port :-

 sudo nano /etc/ssh/sshd_config


Search for line --> #Port 22

Add a new line just below it with your preferred new SSH port --> Port [Your New SSH Port Number]
(eg. Port 9222)


3) Restart the SSH service :-

 sudo systemctl restart sshd


4) Also you might want to check UFW (if enabled) to have the specific port enabled :-

 sudo ufw status


5) If the new port was not in the list, run the following command to ALLOW the access :-

 sudo ufw allow 9222/tcp


6) Now you will need to DENY the access of common SSH port number 22 :-

 sudo ufw deny 22/tcp


7) Now you can test the connection of the new port and the old port to confirm the connection is properly configured. Also ensure the firewall also allows the newly created port pass-thru.


!!! HAPPY COMPUTING !!!


Jun 22, 2023

Ubuntu : Apache2's Module - WebDAV

WebDAV (Web Distributed Authoring and Versioning) is a set of extensions to the HTTP (HyperText Transfer Protocol) which allows Users to collaboratively author contents directly in HTTP web server by providing facilities for concurrency control and namespace operations.

In this tutorial, we will focus on the Installation and Configuration of WebDAV via Ubuntu Server v.22.04.2 and Apache2 Web Server.

For more information on How-To install Ubuntu Server, please refer here (https://danielcheah.blogspot.com/2023/03/linux-install-ubuntu-server-v22041.html)

For more information on How-To install Apache2 Server, please refer here (https://danielcheah.blogspot.com/search/label/Apache)

1) Enabled Apache2's WebDAV module:

 sudo a2enmod dav


 sudo a2enmod dav_fs


2) Restart Apache2 service:

 sudo systemctl restart apache2


3) Create a new folder in Apache2:

 sudo mkdir /var/www/webdav


4) Change ownership for that new folder:

 sudo chown www-data:www-data /var/www/webdav


5) Create another new folder to store the WebDAV's DB file and change the ownership:

 sudo mkdir -p /usr/local/apache/var


 sudo chown www-data:www-data /usr/local/apache/var


6) Modify the Virtual Host file for the domain (eg. demo.gob.com.my):

 sudo nano /etc/apache2/sites-enabled/demo.gob.com.my.conf

* The file name depends on your domain name created during installation of Apache2.


7) Add the following content into the Virtual Host file as below, as per in "RED" text:
DavLockDB /usr/local/apache/var/DavLock

<VirtualHost *:80>
    ServerAdmin demo@localhost
    ServerName demo.gob.com.my
    ServerAlias www.demo.gob.com.my
    DocumentRoot /var/www/demo.gob.com.my
    ErrorLog ${APACHE_LOG_DIR}/error.log
    CustomLog ${APACHE_LOG_DIR}/access.log combined

    Alias /webdav /var/www/webdav

    <Directory /var/www/webdav>
        DAV ON
        AuthType Digest
        AuthName "webdav"
        AuthUserFile /usr/local/apache/var/users.password
        Require valid-user
    </Directory>

</VirtualHost>


8) Check the Apache2 configuration and restart the service:

 sudo apache2 configtest


 sudo systemctl restart apache2


9) Now we need to create a file to store all Username and change the ownership of the file:

 sudo touch /usr/local/apache/var/users.password


 sudo chown www-data:www-data /usr/local/apache/var/users.password


10) Create the first Username and its corresponding password:

 sudo htdigest -c /usr/local/apache/var/users.password webdav demo

* webdav --> Realm
* demo --> Username
* It will automatically prompt you to key-in the password for the new user.


11) Enable Apache2's Digest Authentication module:

 sudo a2enmod auth_digest


12) Restart Apache2 service:

 sudo systemctl restart apache2


13) Now create a dummy file for testing purposes and assign the appropriate ownership:

 sudo nano /var/www/webdav/testfile.txt

* Type some text into that file.

 sudo chown www-data:www-data /var/www/webdav/testfile.txt


14) To verify the connection, open any inter browser (eg. Google Chrome) and browse to (eg. http://demo.gob.com.my/webdav)

You should be prompted with a username and password, continue to key-in the username (eg. demo) and the password.

Upon successful login, you will able to view the dummy file created earlier and able to download/access the file accordingly as per below screenshot.


WebDAV Dummy File


15) You can also map a network drive by using the same URL / Path and with the same username and password.


!!! HAPPY COMPUTING !!!