The following commands will allows you to delete VM that are "Invalid" in the WebUI.
1. Run SSH via Putty or any remote console of your choice.
2. Login as "root" into the ESXi server.
3. Type --> vim-cmd /vmsvc/getallvms
* To display all VMs in the server.
4. Take note of the "VMID" columns and any error messages shown such as "skipping unknown VMID 10" or similar messages, this is the VM that you might want to delete from the server.
5. Type --> vim-cmd /vmsvc/unregister <vmid>
* To unregister the specified vmid from the server.
6. If successful, you can exit from SSH and login back to the server via the WebUI.
7. Goto "Browse Datastore" and remove the invalid VM from the HDD.
Simple right ?
!!! HAPPY COMPUTING !!!
Nov 19, 2019
Sep 27, 2019
Install : Ubuntu Desktop v.18.04.3 LTS
1. Boot
ISO from either CDROM/USB Flash Drive, ensure LAN cable is connected with DHCP
enabled and HDD doesn’t contains any data or (clean).
2. Select
à
Install Ubuntu.
3. Desktop
version will automatically install the GUI and will try to connect to Ubuntu’s
Repository to download and install any latest patches/upgrades.
4. Language
= English.
5. Keyboard
Layout = English (US).
6. If
Wireless Adapter is available, it will be automatically detected (if
compatible) and it will prompt for connecting to any available Wifi Network.
This step can be skip for now as long as the LAN cable is connected.
7. Depends
on the usage & purposes, you can select either of the following
installation options :-
a. Normal
Installation (includes Libre Office Suites, Multimedia Applications, Tools
& Utilities).
b. Minimal
Installation (basic Tools & Browser only).
8. When
prompted, select à
Use Entire Disk à
Continue.
9. Select
the correct time zone à Kuala Lumpur.
10. On
the next page, it will prompt for some basic informations :-
a. Your
Name : [Preferred Display Name]
b. Your
Computer’s Name : [Hostname]
c. Login
Name : [Username]
d. Password
: [Password]
e. Login
automatically / Require my password to login.
11. It
will prompt for restart and automatically eject the CDROM drive (if any), once
ejected it will prompt you to press à [ENTER] key to
restart.
12. Once
restarted, open “Terminal” apps and key-in the following command line :-
a. sudo
apt-get update
b. sudo
apt-get upgrade
c. sudo
shutdown now –r
13. To
disabled Network Printer Auto-Discovery & Auto-Install of drivers, run the
following command line :-
a. sudo
nano /etc/cups/cups-browsed.conf
i.
Search for and change it to à
BrowseProtocols none
ii.
Save and exit.
b. sudo
service cups-browsed restart
c. sudo
service cups restart
d. sudo
nano /etc/avahi/avahi-deamon.conf
i.
Search for section à [server]
ii.
Type-in these line under it à
enable-dbus no
iii.
Save and exit.
e. sudo
service avahi-deamon restart
14. Install
and Run HDD defragmentation tools :-
a. sudo
apt-get install e2fsprogs
b. sudo
e4defrag /
15. To
install Google Chrome in Ubuntu Desktop :-
a. Open
Mozzilla browser à
https://www.google.com/chrome OR https://dl.google.com/linux/direct/google-chrome-stable_current_amd64.deb
b. At
the web page click à Download Chrome
c. Select
à
64bit.deb (for Debian/Ubuntu)
d. When
prompted select à
Save file
e. Once
download completed, open à Files à and search for “google-chrome-stable_current_amd64.deb”
f.
Double-click that file and it will auto install.
Jul 28, 2019
VMWare : Clonning from Physical to Virtual
Recently I've encounter some problems of converting a CentOS v.5.0 into VMWare ESXi v.6.7, this is particularly due to the tool (vCenter Converter Standalone) doesn't support CentOS v.5.0
So, instead of installing a brand new CentOS v.7.0 and migrate all the Oracle database into the new VM (Virtual Machine) manually, I proceeded to "clone" the physical machine.
There are some considerations before proceeding, the physical server's hardware specifications. How much RAM was installed, how many "Logical Array" is using. This will impact the creation of the VM, as such the ESXi server (host) must have sufficient hardware to support such a move.
The process is relatively easy, as this is done through "Direct Console Login", I was not able to provide the screenshots due to security issues. But nonetheless this are the steps I've taken and was successful.
Assumption :
a) The existing physical server (CentOS 5) hardware is 2 x NICs, 8GB RAM, 300GB x 2 RAID1, 300GB x 2 RAID1, 600GB x 2 RAID1.
(Note : a total of Three (3) logical drives was present, this part is important at the later stage).
b) External USB 2TB or more HDD.
The Steps-by-Steps :
1. Download the latest version of CloneZilla. At time of writing, the latest stable version v.2.6.2-15 and the edition I've downloaded is (i686, ISO) which is compatible with the server's hardware.
2. Using your preferred ISO burner, burn a bootable CDROM disc and you might want to label it for easy references.
3. Shutdown the CentOS 5 server by running command : shutdown now -h
4. Insert the CloneZilla bootable CDROM disc and plugin the External USB HDD into the CentOS 5 server.
5. Power-up the server and Press --> [F12] key.
* Note : Your server might have different key for invoking the "Boot Menu".
6. Select booting from the CDROM drive and wait for CloneZilla to boot automatically.
7. Follow the on-screen instructions, like language & keyboard selection.
8. Next is to select --> device-image option.
9. Then select --> local_dev option, then it will prompt you to press [ENTER] key to continue.
10. At the next screen, you will be shown a list of all the local drives & external USB drives detected. Just press [CTRL] + [C] to continue. You need to ensure the external USB HDD is detected correctly.
11. Next screen is to select "Home/PartImg" location, which in this case is the external USB HDD drive.
12. Next screen when prompt, just select --> OK button to continue, then it will prompt you what is the task you wanted to perform, in this case we select --> save_disk option.
13. Next it will prompt you for the image's filename, put a name that is simple & easy to remember (eg. svr_centos5_28Jul19), next is to ensure the image file size is unlimited, type --> 1000000 to ensure Clonezilla will not split the file according to 4GB limitation.
14. Leave the compression as default at either Z0 or Z1, of course you can have higher compressions but since I have a 2TB drive... so not a problems.
15. Next is the encryption prompt, this all depends on you. But as I'm the only 1 person in-charge & I do not need to keep the image after restoring, I will not encrypt the image files.
16. When prompted, just press --> [Y] to start the clonning process, this may takes a few hours (mine took me 14 hours) and select --> Shutdown when completed.
Note : More information can be found at Clonezilla website, please do visit their website.
17. Once all is completed, we will be moving the VMWare server. First we need to create VM and all the configurations must match exactly as the CentOS 5 server, such 2 x NICs, 3 x Drives & 8GB RAM.
18. For the selection of Guest OS, I've selected --> CentOS 4/5 64-bit version.
19. Also I've configured the CDROM to use an ISO image file instead of the host's drive. I need it to boot into CloneZilla for the image restoration.
20. Next is plugged in the external USB HDD into the host server and add a "USB Device" in the VM, this is to ensure the drive is detected properly.
21. The following is boot the VM into CloneZilla and start restoring "restore_disk" process, leave everything as default will do.
Oh, you might want to select --> "Skip checking source image" option & "Shutdown" after complete.
22. Before power-on the VM, you need to remove the external USB HDD from the settings and also the ISO file.
23. Just power-on the VM like normal & look out for any irregular warnings or critical messages. But thus far I've didn't encounter any error messages or similar and everything just works as it was supposed to.
!!! HAPPY COMPUTING !!!
VMWare : ESXI v.6.7 - Change Hostname
A step-by-step on changing the VMWare ESXi v.6.7 hostname, no not the virtual machine's hostname but the Hypervisor's hostname.
1. Login to the Web Client interface.
2. Browse to --> Networking menu.

3. Select --> TCP/IP Stack menu (or tab).

4. At the --> Actions button, select --> Edit settings.

5. Click on the --> Edit the [Host name], [Domain name] and any other settings you've wanted.

6. Once completed, just click --> Save button.
!!! HAPPY COMPUTING !!!
Jul 5, 2019
VMWare : vCenter Converter Standalone (P2V)
I was doing a migration from Physical server to Virtual server, specifically in VMWare ESXi Hypervisor v.6.7
Luckily VMWare does have a FREE tools called VMWare vCenter Converter Standalone, download here. As of writing the latest version is v.6.2.0
The installation is very simple and straightforward, you just need to ensure the following ports is open at the firewall.
(A) Server Ports.
1. TCP = 443, 445, 139, 9089, 9090
2. UDP = 137, 138
(B) Client Ports.
1. TCP = 443
The above ports need to be enabled at the Firewall and I've only done the P2V from Windows Server 2008 R2 to ESXi v.6.7 Hypervisor. I've yet to try the Linux OS thus unsure how it will works.
Take note that the "Source" server must also have the Converter installed as "Agent", then from the "Server" Converter connect to the "Source" to perform the conversion.
!!! HAPPY COMPUTING !!!
Jul 1, 2019
Notebook : HP Beats 15-p016AU (Disassembly)
This is another example of bad design of notebook, you need to disassemble almost all the parts just for a simple HDD and RAM upgrades.
Let's start shall we....
1. Remove all the screws as shown.

2. You need to remove the black cover to reveal another hidden screws.


3. Next turn over the notebook with the keyboard facing you and slowly open the entire bezel, becareful on the keyboard & touchpad's ribbon cables.

4. After removing the bezel, you can now see the mainboard as shown below. If you have noticed, the RAM slots are not visible.

5. Disconnect all ribbon cables and cables and remove the screws as shown below.

6. Slowly remove the mainboard, as always do not force it out. Once the mainboard is removed, turn it over and now you can see the RAM slots (as shown below).

You know I don't really understand by manufacturer decided not to grant easy access to these components... I really don't... anyway I hope these will help others.
!!! HAPPY COMPUTING !!!
Ransomware : HORON (Recovering Encrypted Files)
Last week, a friend of a friend was very unlucky and got infected with Ransomware "HORON", all his files was encrypted or held ransom. He have asked his friend to assist but he only managed to clear the virus but not recovering his files, he also tried sending it to the nearest computer shop for help but they also can't assist further.
Lastly he seeks help from his friend and this friend so happens to knows me, well at first they did not told me it was ransomware, he told some kind of virus only. So I was like why there are no anti-virus installed in the first place ?
It seems that he's not very familiar on the terms of computer, all he knows is using it.... Duh!...
After some studies and checking on the ransomware, it was infected with "HORON" which it encrypts all the files such as Word, Excel, PDF, JPG, BMP etc. It will leave behind a text file demanding for ransom "_readme.txt" in each of the infected folders.
So I did some searching and studies on the internet and this ransomware is kinda old and was a known infections, luckily someone took the efforts to developed a tool to decrypt it ... bravo guys !!!
NOTE : I do not take credits on this, as the tools was not created by me, I just summarized the steps on recovering the files and removing the ransomware entirely.
1. On the infected computer, boot Windows into "Safe Mode". This can be done in 2 ways :
a) Boot the computer normally, then search for "msconfig", goto "Boot" tab and enabled "Safe boot" option with "Minimal" setting. Save and restart the computer.
b) During the POST screen (before the Windows loading screen), press [F8] key repeatedly to invoke the boot selection. Select "Start Windows in Safe Mode" option (the words may not be exact depending on which Windows you are running on).
2. Once boot-up, open Control Panel --> Folder Options. Under "View" tab, enabled "Show hidden files, folders and drive" option.
3. Now browse to --> C:\Windows\System32\drivers\etc folder and look for a file named "hosts", edit the file using "Notepad". Ensure there are no DNS entry in the file, if it exist just delete all entries and save the file.
Example of an empty "hosts" file should look like :

4. Next is to ensure there are not program started automatically, goto --> C:\ProgramData\Microsoft\Windows\Start Menu\Programs\StartUp folder, delete all applications in the folder just to be sure.
5. Next is to ensure there are no entry in the registry, open "regedit" and browse to the following entry :
a) HKEY_Local_Machine\Software\Microsoft\Windows\CurrentVersion\Run --> Remove all entries just to be sure or if you know that is the drivers loading then leave as those entries as is, only remove entries that are suspicious or in doubt.
b) HKEY_Current_User\Software\Microsoft\Windows\CurrentVersion\Run --> Do the same as above.
c) Then search for "%temp%" folder, remove all entries also.
6. Once done, you can open back "msconfig" and disabled the "Safe Boot" option or if you press [F8] key then just simply restart the computer normally.
7. On a good/clean computer, download the following tools from the link below (note that some anti-virus may report these tools as virus and may blocked it from downloading, thus you need to temporarily disabled your anti-virus program before doing so).
a) Download FileLocater Lite (aka AgentRansack), link here. This is an exe file, download and installed it on the infected computer.
b) Download the "STOPDecrypter" latest version here. This is a zip file, download and extract on the infected computer.
8. Once both the tools is copied/installed on the infected computer, run the "STOPDecrypter" tool (run as admin), select "Yes" when prompted to continue.

9. Next is to select the infected folder by clicking on "Select Directory" button, note that the tool also works with sub-folders, thus only select the root folder. But beware that selecting the entire root folder will results slow response of the computer.

Once the folder is selected, click on the "Decrypt" button to start the process, this may take some times depending on the file sizes and quantity of the files. Some file types takes longer to decrypt such as .MP4 or video files.
As such it is important to decrypt only data files and not programs like .apk or .dbf or similar.
10. As the process only decrypt the files, the existing *.HORON files are still intact, thus if the decrypt is successful, you need to manually delete those files to avoid your HDD space running out. Use the "FileLocator Lite" tool to do this at more easy and convenient way.
a) Click --> "Folder" icon (next to "Look in" field).
b) Type --> *.horon (in "File name" field).
c) Click --> Start button.
Example screenshot of the tool below :

Once the search completed, simply select all the files and press the [DELETE] key, next is to empty the "Recycle Bin" when you confirmed all data files is decrypted successfully.
NOTE : Be careful when doing this step, if you wrongly select the folder you may accidentally delete files that are yet to be decrypted.
11. Once all the files have been decrypted, you may want to transfer (Copy & Paste) to an external HDD or flash drive. Then you may want to reformat & reinstall the computer, just to be sure but this steps is of course optional but highly recommended.
Hope this will help others and do yourself a favour and install at least some kind of anti-virus like Microsoft Defender or better.
!!! HAPPY COMPUTING !!!
Jun 27, 2019
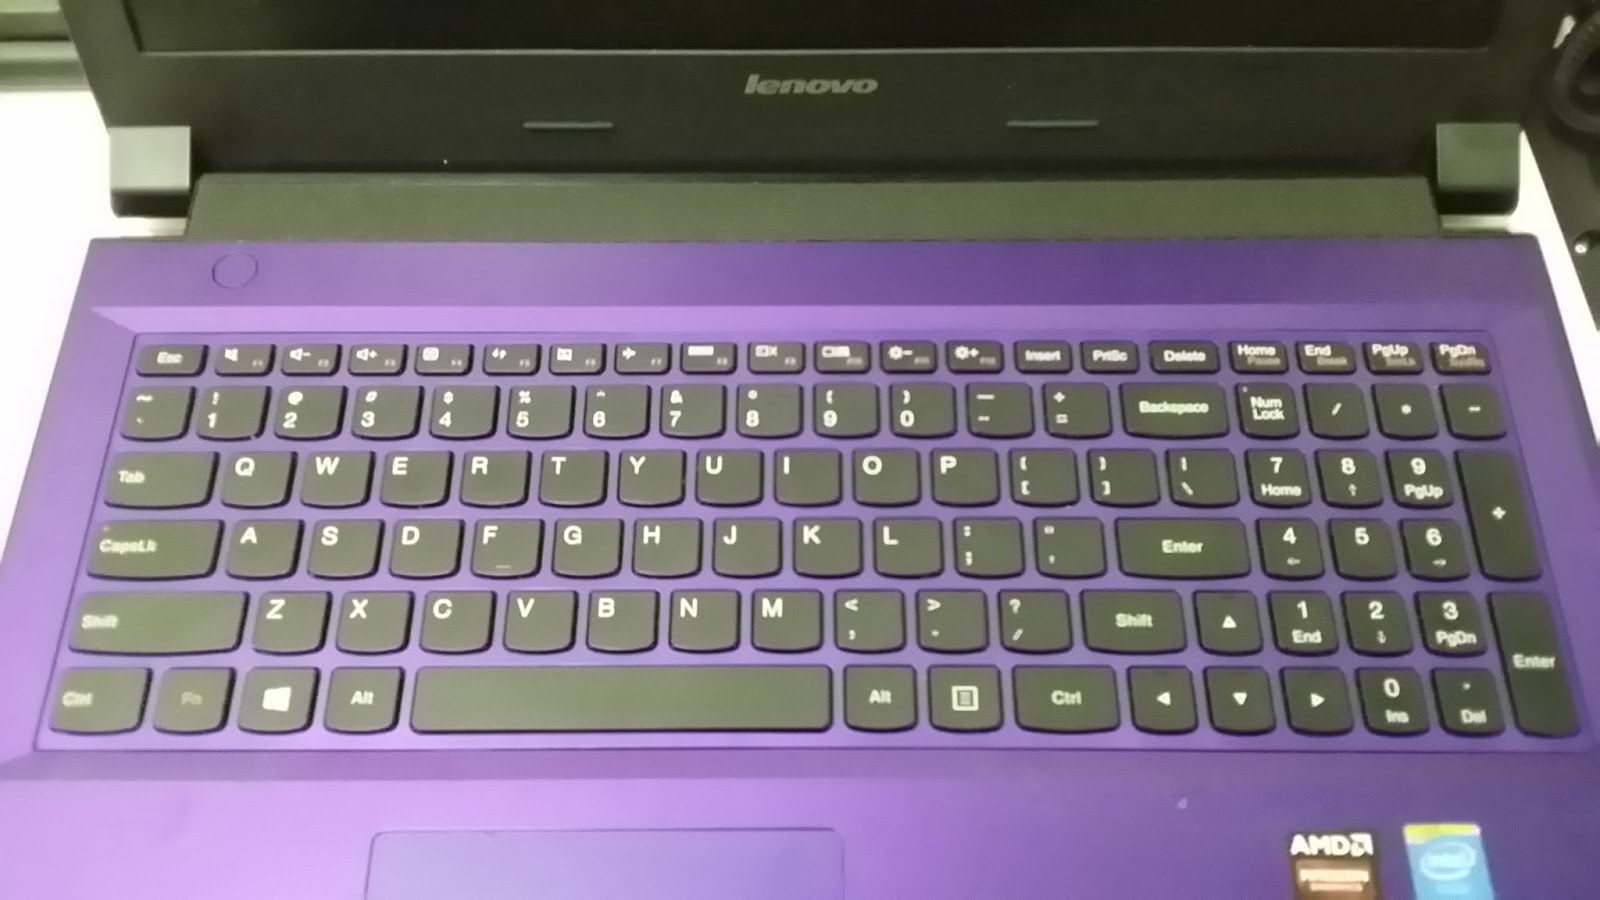
Notebook : Lenovo IdeaPad 305-15IBD [MT : 80NJ] (Disassembly)

Another posting for disassembly of a Lenovo notebook, the access to the RAM and HDD upgrade is very simple but to service the CPU's fan or refreshing the thermal compound required further steps as below :-
1. Remove the easy access cover, screws position as highlighted with arrow.

2. After removed, it will reveals the RAM slots and the HDD. Even access to the CMOS battery and the Wireless card is visible.
At this stage you can easily upgrade the RAM or the HDD but if you wanted further access such as to the CPU then proceed to step #3 below.

3. Remove those screws as per highlighted in arrow below.

4. Turn over to remove the keyboard panel.
5. Carefully and slowly peel the keyboard panel to reveal the bezel. Becareful of the keyboard's ribbon cable as usual.
As this unit was serviced before, thus I did noticed some missing screws which was supposed to be there but aren't. As such I was unable to determined the actual screws location for this bezel.

6. Now slowly and carefully remove the keyboard's bezel for the mainboard access.

7. Next is to disconnect those ribbon cables as circled in red and remove the screws as per arrows shown below.

8. Once you have done that, slowly flip over the mainboard to access the CPU's heatsink and fan, there you can proceed to refresh the thermal compound and clean the heatsink and fan.
This model is very easy and have simple access, you just need to be very meticulous in looking for the screws as its very obvious and noticeable.
!!! HAPPY COMPUTING !!!
Jun 18, 2019
Windows 10 : Enabled Edition Selection
Have you ever encountered OEM computers that have the "Digital Key" embedded into the BIOS/UEFI ? Now days modern computers whether desktops or laptops is running on UEFI and have the Windows License Key embedded into it.
But this license is either OEM or the pre-specified Edition (eg. Home Edition), this is good relatively to End Users but for Corporate Users that have their own licensing (eg, MAK/VLK) then it will be a headache. This is because the Windows 10 will automatically detect the OEM version at startup (even though you install from scratch) and automatically pre-select the appropriate Edition for you. But you wanted to use your own Corporate License Key and thus causes headaches.
There is a simple workaround on this, just follow these steps below :-
1. Download the Windows 10 ISO file, any architecture will do (eg. 32-bit/64-bit). You can use the Windows Media Creation Tool to download. You can also follow this steps on how to download and save it as an ISO file, link here.
2. Once downloaded, use any ISO browser/maker (I'm using MagicISO but any tools will do). Browse to "/sources" folder and look for a file named "ei.cfg", copy the file into your local folder (eg. Documents).
Note : If you are unable to locate the file in the ISO, no worry..... just create the file, ensuring the extension is correct will suffice.
3. Edit the "ei.cfg" file using Notepad. You may see the contents something similar as below.

4. Modify the contents as below, depending on your license type it may varies. Since our license is "Volume License" thus we need to enabled it.

5. Save the file then copy and paste it back to "/sources" folder and overwrite it. Now save the ISO file, next is your choice of either creating a bootable USB drive or burn the ISO into a DVD disc.
6. You may also want to have read on this in Microsoft Website for a better understanding.
!!! HAPPY COMPUTING !!!
But this license is either OEM or the pre-specified Edition (eg. Home Edition), this is good relatively to End Users but for Corporate Users that have their own licensing (eg, MAK/VLK) then it will be a headache. This is because the Windows 10 will automatically detect the OEM version at startup (even though you install from scratch) and automatically pre-select the appropriate Edition for you. But you wanted to use your own Corporate License Key and thus causes headaches.
There is a simple workaround on this, just follow these steps below :-
1. Download the Windows 10 ISO file, any architecture will do (eg. 32-bit/64-bit). You can use the Windows Media Creation Tool to download. You can also follow this steps on how to download and save it as an ISO file, link here.
2. Once downloaded, use any ISO browser/maker (I'm using MagicISO but any tools will do). Browse to "/sources" folder and look for a file named "ei.cfg", copy the file into your local folder (eg. Documents).
Note : If you are unable to locate the file in the ISO, no worry..... just create the file, ensuring the extension is correct will suffice.
3. Edit the "ei.cfg" file using Notepad. You may see the contents something similar as below.
4. Modify the contents as below, depending on your license type it may varies. Since our license is "Volume License" thus we need to enabled it.
5. Save the file then copy and paste it back to "/sources" folder and overwrite it. Now save the ISO file, next is your choice of either creating a bootable USB drive or burn the ISO into a DVD disc.
6. You may also want to have read on this in Microsoft Website for a better understanding.
!!! HAPPY COMPUTING !!!
May 4, 2019
Notebook : Lenovo IdeaPad S500 [P/N : 500-14ISK] (Disassembly)
For this particular model the Lenovo IdeaPad S500 is kinda also like the rest, where you need to remove the entire bottom cover just for RAM or HDD upgrade. Luckily it was relatively easy (so to speak) to locate the DIMM slot(s).
But sadly there is only 1 DIMM slot available thus you can only upgrade to a higher capacity RAM instead of adding more.
As I'm removing the bottom cover, I found out that there's are no hidden screws beneath those rubber pads. Well... lucky me. :D

Immediately I'm greeted by the mainboard, HDD and battery..... but wait, where is the RAM's slot(s) ? Not another type that need to remove the mainboard just to flip over to reveal the it ?

Of course no, its just been covered up by the aluminium shielding (as show below).

After removing the shielding, now you can see the DIMM slot is now visible.

Sadly as I've mentioned earlier, there is only a single DIMM slot available. So you can only choose to replace the existing RAM with higher capacity. Upon checking with Kingston website, only the following model is available :-
1) Kingston 8GB DDR3 1600Mhz [P/N : KCP3L16SD8/8]
There is also a 4GB model, but the existing unit is already at 4GB capacity thus I never bother to check it out since higher capacity of 8GB is available.
This also shows that the maximum capacity available for this notebook is max out at 8GB, there's no way you can upgrade to 16GB (unless you are able to source it and its kinda expensive here in Malaysia for that capacity). Even though you are able to source similar specifications, but there's no guaranteed it will be stable as its untested.
I still preferred parts that are fully tested and proven to works, anyway its up your choice.
!!! HAPPY COMPUTING !!!
Notebook : HP Pavilion x360 Convertible [P/N : 13-u113TU] (Disassembly)
A friend of mine recently found his laptop to be either very slow or will sometimes freezes, he asked my help to upgrade it or to make it fast (whatever it takes)...


Well you know me, I can't reject a friend :D
To be on the safe side, I need to ensure the part's number is correct and whether it supports any kind of upgrade such as RAM & SSD. Thus taking it apart is a must, well kinda as I also need to refresh the thermal compound of the CPU.... here it goes.
At first glance, the first thing that came into my mind was.... WOW! only 4 hidden screws ?? Then I realized there's more hidden beneath the rubber strip (as shown below).

As always, opening any plastic cover take patience, slow, steady and skills. After removing those rubbers it reveals all the screws.

Trying my best to remove the cover doesn't seems to work, after figuring out what went wrong then it just hit me that there's another hidden screw in the middle. Who would have thought that is a screw hidden in there.

Now after removing the middle screw, I thought this is simple but to my surprise I need to flip over to remove the keyboard instead. Carefully I removed the entire keyboard panel as not to damaged the keyboard & touchpad ribbon cables.

Flipping over the keyboard panel after its been removed. Nothing much here but just to shows you how it looks like.

The below picture is the mainboard revealed, just like normal the HDD, battery and other stuffs is visible, but I can't seems to find the RAM's slot(s). Now it hits me again, the RAM slot(s) might be underneath the mainboard and just to be sure I need to remove the mainboard.... ugghhh !! This have disassembly tasks have become from normal to extreme.

There are 6 screws to remove the battery, be careful on the connectors as its directly connected to the mainboard thus you need to tilt it up abit before sliding out.

How it looks after removing the battery.

Now to remove the HDD, you need to first disconnect the ribbon cable then only remove the 4 screws.

This is how it looks like after removing the HDD.

Before removing the mainboard, you will need to first disconnect all those ribbon cables (as shown below).

Now its time to remove the screws, location as show below. Take note that there's CMOS battery attached to the mainboard and need a little bit of prying on the battery as its glued to the case.

After removing the mainboard, this is how it looks like.

This is the mainboard's view.

Now flip it over, you now able to see the RAM's slots. There are 2 DIMMs available.

Upon checking the RAM's specification, its a DDR4-2400 type. Now I have compared it with HP's PartSurfer website (just for double confirmation). It shows SPS-MEM 4GB 2133MHz 1.2v DDR4 SHARED (P/N : 820569-005).

Sadly upon checking with Kingston & Transcend website, they no longer supports or manufacturer RAM upgrade for this model. Hence I will need to look for an almost similar specifications but un-tested for this notebook thus I'm also not sure of the stability of it.
I've yet to check with HP for the parts availability but I'm doubtful they will have it too. Its kinda sucks for this model to have 2 DIMMs slots yet we need to remove almost everything just for a RAM upgrade.
I still like those models where its just as simple as removing part of the bottom cover to reveal on the RAM or HDD parts. Well I think those days are gone now for sure.
!!! HAPPY COMPUTING !!!
Apr 9, 2019
Xpenology - Synology DSM 6.1 in PC (Part #1 - Preparation)
It have been sometimes now since my last posting, so I think its time for me to start some overdue posting.
Now we all know the famous Synology brand name, they are famous & popular with their range of NAS (Network Attached Storage) and particularly their user's friendly DSM (Disk Station Manager) operating system.
Before we move on to the next topic, take note that I do not recommend this in a production environment for company. This little project is merely for fun and to test out the DSM OS before purchasing the actual product. If you have important data or intent to use it in a company environment, it is HIGHLY recommended to purchase the Synology product directly as it comes with support & warranty.
Xpenology itself doesn't contains the DSM OS (for more information visit their website), its just merely a bootloader (similar to GRUB4) and its functions is to boot the DSM OS on a desktop PC and run it. Some people called it a "hack" while some called it "testing", whatever your reasons is.......... its just for fun and testing and in any conditions it is NOT RECOMMENDED FOR ENTERPRISE OR COMPANY OR IMPORTANT DATA STORAGE USE.
Let's start..... :)
First we need to prepare ourself a few things :-
1. An old desktop PC that you have (eg. lying in your garage or store room) with a decent CPU (eg. Intel Pentium 4 or above), 2GB RAM or more (recommended is to have more RAM the better), a few working HDD (any capacities, it can mix & match if running in SHR mode).
2. At least 2 x USB 8GB drives (recommended to use Sandisk brand). 1 for the installation & 1 for loading the Xpenology bootloader.
3. Download the matching Xpenology bootloader. I'm using the Jun's mod 1.02b version.
[Filename : DS3615xs 6.1 Jun's Mod V1.02b.img]
4. Download the matching Synology DMS OS version. I'm using Synology DS3615xs v.6.1.7 (15284) version.
[Filename : DSM_DS3615xs_15284.pat]
5. Download Rufus USB tool. Any version will do the job.
6. Download OSFMount tool. Any version will do the job.
7. Download Notepad++ tool (not necessary but recommended). You can also use the generic Notepad but it is better with this tool.
8. URL Link for Serial Number Generator. This is to generate a S/N for tricking the DSM into loading the actual DSM OS.
9. USB Flash Drive PID tool. This is to check the USB flash drive VID & PID number.
10. The desktop's MAC Address, this is usually found inside the BIOS/UEFI system information. But if you're using additional NIC card(s) then its usually stated either on the box or at the card itself. If you're unable to locate the MAC address then try use this MAC Address Generator tool (though I've never use it but it was suggested by some forumers).
11. Also lastly download SSH Client tool or more commonly known is Putty. This is to login to the DSM terminal to enable the SHR mode.
The desktop I'm using in this tutorial is a very old HP desktop lying in my store room. It have the following specification :-
HP Pro 3000 MT Desktop.
- Intel Core i3.
- 8GB DDR2 RAM.
- Intel ICH7R chipset Mainboard.
- Built-in Intel High Definition Graphics.
- Built-in Sound & Gigabit NIC.
- 1 x 500GB SATA HDD.
- Added 3 more SATA HDDs, 2 x 500GB & 1 x 250GB.
Note : The contents of the HDDs will be ERASED, please ensure you have backup all the data out before proceeding.
Another reminder on the HDDs, if you have a RAID Controller you might want to disabled it and let it run under AHCI or IDE mode if you wanted to use the SHR mode (Synology Hybrid RAID) which is highly recommended.
Unless you prefer to use hardware RAID instead then you can proceed to whichever RAID level you've wanted. But do keep in mind that hardware RAID required all HDDs to be in the same capacity or higher and have limited expandability.
That is why I use the SHR mode instead which it can be expanded in the future easily.
>>>>> Part #2 - Installation (coming soon...)
Subscribe to:
Posts (Atom)